Analytix Auto Export and Email
Introduction
Qlikview does not have a native solution, other than NPrinting, which is an expensive add on, that enables you to export and email users charts on a schedule.
We have created a set of macros that, when following this document, will enable you to export charts to an Excel file and email them to a set of recipients.
Be aware that the more charts you create to be sent on a schedule, makes maintenance more difficult. We have found that most sites use between 1-5 charts set to export and email.
Here is an example of what this process will allow you to do.
Let's say that the chart below is the cart that we want to export and email to people.
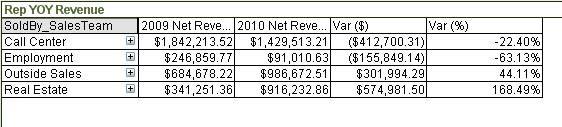
Notice that the first dimension is the SoldBy_SalesTeam. This is going to be our GroupField. The field we choose as the GroupField is going to be the field that we “loop and reduce” on.
Loop and Reduce means that we will filter by each SalesTeam and then export that as an Excel file, which will mean that we will have 4 excel files from the above chart. One XLS file for each Sales Team.
As each XLS file is created, it will be emailed to whatever email address is attached to it in the data model. The email field must be called OutputEmail.
All of these steps are controlled using macros within Analytix.
Step 1 - Create QVW And Add Macro Functions
To make this automatic, we need to create a new QVW and run the macros through a batch file.
So step one is to make a copy of the Analytix QVW file that you want to run auto exported reports out of. This usually is the SalesFlash.qvw file.
In the QVW directory make a copy of the SalesFlash.qvw called SalesFlashAutoExport.qvw.
Next download the needed macro functions which are found within the AML (Analytix Macro Library) Auto Export Functions and install them.
To install these additional macros, open up your new QVW and choose Tools/Edit Module... from the menu.
This will open up the macro editor. Scroll to the bottom and paste the contents of the AML-AutoExportMacros.txt file
Set Module Security
This is very import and if not set properly, you export will NOT work.
Go to the Edit Module dialog (Tools/Edit Module...) and set:
- Requested Module Security = System Access
- Current Local Security = Allow System Access
Step 2 - Create your Chart
Next you will need to create the chart that you want to setup to auto export. It is important to make note of this charts Object ID.
The Object ID can be found on the Properties sheet of the chart you are working with.
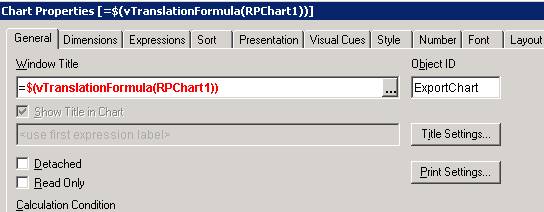
In this case I have renamed the Object ID to ExportChart. This will be used when we create the driving macro.
Step 3 - Create your Group Field
Depending on your chart and needs, you will choose the field that you will designate as the Group Field. As stated before, this is the field that will be used to loop and reduce your data.
The Group Field will determine what the contents of each excel file will be. For example, the below chart will have a Group Field of SoldBy_SalesTeam, so our process will filter by each Sales Team and create an Excel file for each team.

If you were creating a report that you wanted sent out to all of your sales reps, then the Group Field would most likely be SoldBy_RepLoginName.
Step 4 - Create Control Variables
You will need to create two variables:
- vExportLocation - determines where the exported Excel files will be stored.
- vRunExport - will be used in a later step to determine if we are to run the export.
To create a variable, go to the Settings Menu, then Variable Overview. Click on Add and type in the variable name .
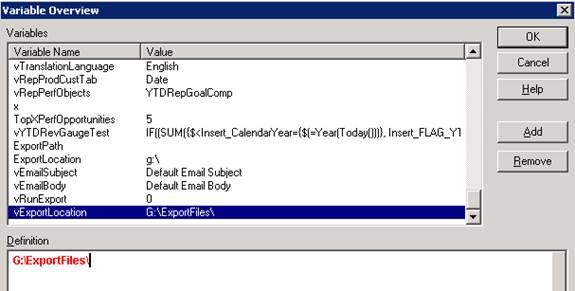
After you have created it, find it in the list and click on it. Then go to the Definition and enter the definition.
- vExportLocation = The full path. Make sure the location exists on your hard drive.
- vRunExport = 0
You can optionally create the variables vEmailSubject and vEmailBody. These will allow you to customize the email subject and body for the email sent.
Step 5 - Create the Export Driver Macro
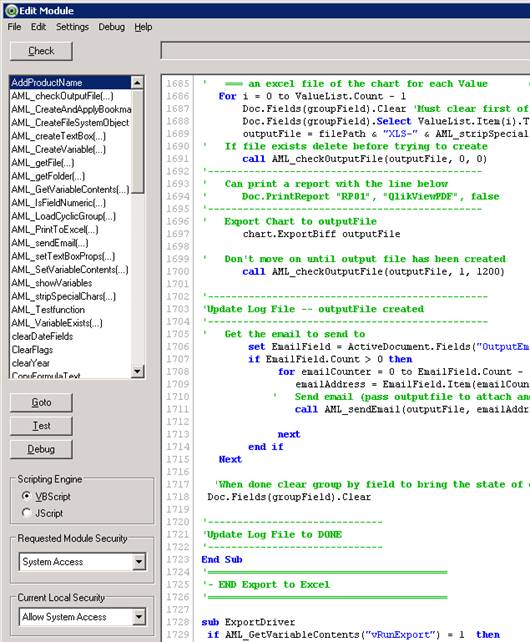
Now we need to create the macro that is going to start this whole process. To do this go to Tools/Edit Module and go to the end of all the code:
At the end, enter the following:
sub ExportDriver
  if AML_GetVariableContents("vRunExport") = 1  then
    call AML_PrintToExcel("vExportLocation", "ExportChart",
            "SoldBy_SalesTeam", "OutputEmailFieldName")
    ActiveDocument.GetApplication.Quit
  end if
end sub
Now you must change the parameters on the call to AML_PrintToExcel to match your information.
call AML_PrintToExcel("vExportLocation",
"ExportChart", "SoldBy_SalesTeam", "OutputEmailFieldName")
- vExportLocation - The variable you created in step 4 that contains the location where you want the XLS files stored.
- ExportChart - The Object ID of the chart you are exporting.
- SoldBy_SalesTeam - The Group Field name. This is the name of a field in the existing data model. You will have one XLS file for each value in this field. If you simply want to export the whole table into a single file pass "" for the Group Field Name.
- OutputEmailFieldName - The name of the field which holds the email addresses you want to send emails to. To disable email sending pass "" for the OutputEmailFieldName.
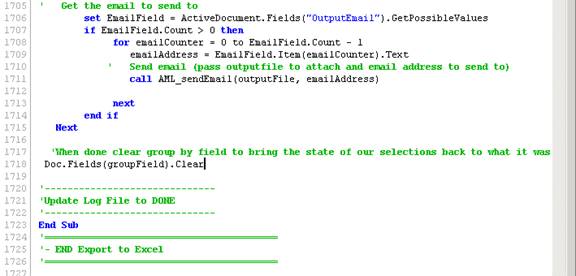
Step 6 - Customize Email Macro
To be able to email, you need to tell our macro what SMTP server to use to send the emails.
This configuration information is set in the AML_SendEmail sub routine.
Open “Edit Module” (Tools/Edit Module) and go to the AML_SendEmail sub routine.
objEmail.Configuration.Fields(
"http://schemas.microsoft.com/cdo/configuration/sendusing") = 2
"http://schemas.microsoft.com/cdo/configuration/smtpserver") = "smtp.yourserver.com"
"http://schemas.microsoft.com/cdo/configuration/smtpserverport") = 465
"http://schemas.microsoft.com/cdo/configuration/smtpauthenticate") = 1
"http://schemas.microsoft.com/cdo/configuration/smtpconnectiontimeout") = 60
"http://schemas.microsoft.com/cdo/configuration/sendusername")= "username"
"http://schemas.microsoft.com/cdo/configuration/sendpassword") = "password"
"http://schemas.microsoft.com/cdo/configuration/smtpusessl") = True
You will want to modify the following four entries to comply with your SMTP Server:
"http://schemas.microsoft.com/cdo/configuration/smtpserver") = "smtp.yourserver.com"
"http://schemas.microsoft.com/cdo/configuration/smtpserverport") = 465
"http://schemas.microsoft.com/cdo/configuration/sendusername")= "username"
"http://schemas.microsoft.com/cdo/configuration/sendpassword") = "password"
- smtpserver - this is your SMTP server. If for some reason your Analytix box doesn’t have access to your company’s SMTP server, you can setup a gmail account and use gmail as an SMTP server.
- smtpserverport - This is the port number for the SMTP server, gmail uses 465, most default to 25. Contact your network administrator if you need help finding this information.
- sendusername - The username for your SMTP server.
- sendpassword - The password for your SMTP server.
Step 7 - Trigger Setup
Qlikview has a feature called Triggers. With triggers, we can cause one action to happen when some other action "triggers" it. In this case, we want to be able to control when the ExportDriver macro runs.
The trigger is when the QVW is opened. This means that every time this QVW is opened it will run the ExportDriver macro. However, within the ExportDriver macro we will be checking the vRunExport variable and only export/email if this variable is equal to 1.
To set this functionality up, go to Settings/Document Properties... and then click on the Triggers tab.
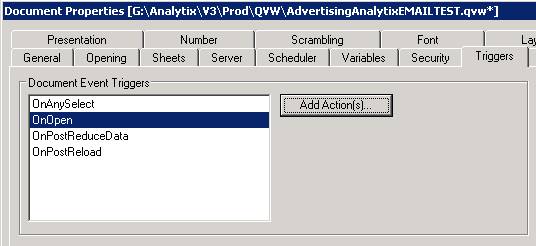
You want to Add Action(s) to the OnOpen Document Event Trigger. So click on OnOpen and then on the Add Action(s)… button.
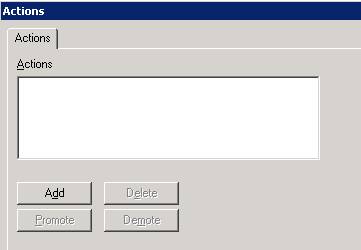
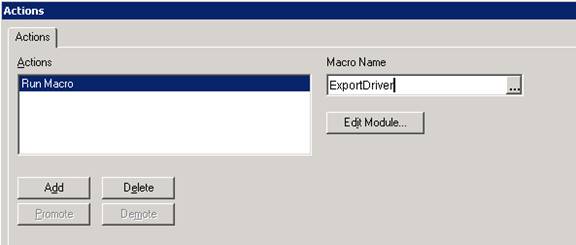
In the actions window, click on the Add button.
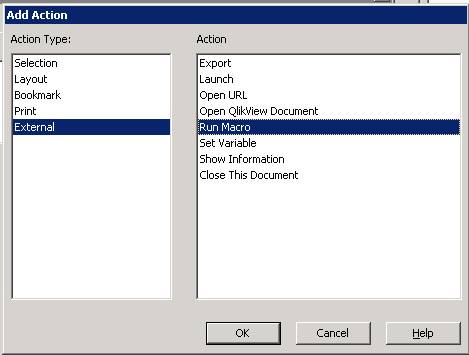
In the Add Actions window click on External in the Action Type box and Run Macro in the Action box, then click OK.
Enter “ExportDriver” or whatever you named your driving function in the Macro Name box and click OK.
Click OK on the Document Properties window.
Now whenever this document is opened it will run the ExportDriver macro.
Step 8 - Create the Batch File
The last step is to make all this happen automatically on a schedule and this done by creating a batch file that will call the QVW file. You can then schedule that batch file to run with Windows Scheduled Task or other task scheduler.
The Batch file will contain the following:
REM ----------------------------
REM ----Reload QVW
REM ----------------------------
start /WAIT C:\"Program Files"\QlikView\qv.exe /vvRunExport=0 /r AdvertisingAnalytixEMAILTEST.qvw

REM -----------------------------------------------------
REM ----Open QVW and then run macro to export and email
REM -----------------------------------------------------
start /WAIT C:\"Program Files"\QlikView\qv.exe /vvRunExport=1 AdvertisingAnalytixEMAILTEST.qvw
The first command reloads the QVW file. Notice that we are setting the vRunExport variable to 0. This will keep the Export Driver macro from running. The /r directive tells Qlikview to perform a reload.
The second command is what export and emails our information. Here we set the vRunExport variable to 1. This will cause our macro to run, which will create the XLS file, email them and then close down Qlikview.
Dynamic Criteria
Since you have probably set this up so that it will run automatically, you are not going to be selecting any filter criteria before the export runs every day. So, whatever selection criteria you selected before the last Save of the QVW file, will be the selection criteria used on each export.
You may be thinking that this will never work! I want to have a different date selection each day.
What you will see below is that we can create very dynamic selection criteria that changes based on the Date as well as other things.
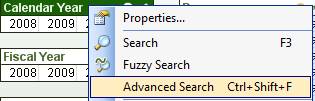
You create dynamic criteria by using the Advanced Search option. You invoke the Advanced Search by either Right Clicking on any list box and selecting Advanced Search or by choosing Edit/Advanced Search.
Anatomy of an Advanced Search
The Advanced Search allows you to search within field using an expression instead of using explicit values. This will allow you to make selection based on Date formulas, like selecting the current date automatically as well as making complex selections like selecting all Sales Reps who sold more than $10,000 in the current month!
Here is how it works:
Search In - This drop down is going to be the field that we are going to make the selection in. So, if you have a list box for this field, when you run the Advanced Search that fields list boxes will have Green selection made in them.
Search Expression – This is where you will create your expression to make the selection. This is a conditional expression that makes your selection. It doesn’t have to be checking against the same field you have selected in the Search In drop down.
Go Button – The Go button will execute your Advanced Search and make it part of your search criteria.
Note: Once you close the Advanced Search dialog you will not be able to edit your Advanced Search Expression. If it is complex, I suggest making a copy of it in case you need to recreate it. Advanced Search expressions will be stored in Bookmarks or saved in the document if they are active at the time of saving.
You can view your Advanced Search expression by going to your Current Selections dialog.
You can bypass the Advanced Search dialog by simply typing in your advanced search expression in the list boxes search area.
However, all subsequent examples will be shown using the Advanced Search dialog.

Example of using Advanced Search
Let’s say you want to have a bookmark that always selects the current month of year. To do this we need to select the current year and the current month.
First set up the current year selection. Do this by right clicking on the Calendar Year list box and choosing Advanced Search.
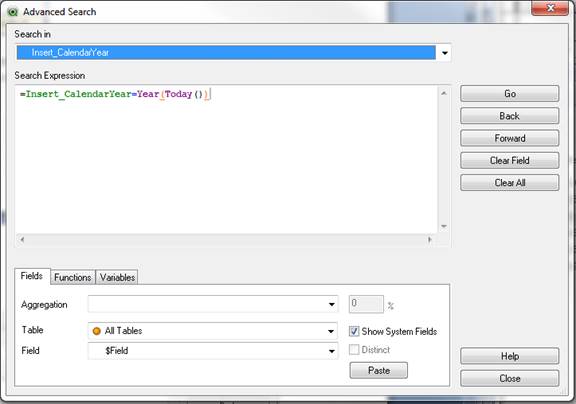
When the Advanced Search dialog comes up, select the Insert_CalendarYear in the Search In drop down and enter the following in the Search Expression:
=Insert_CalendarYear=Year(Today())
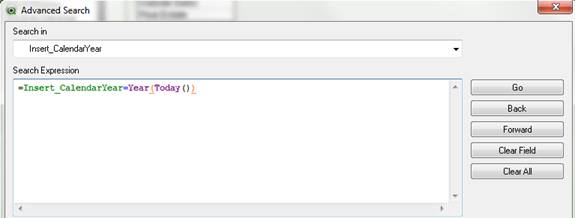
Then press Go and then press Close.
Now we need to select the current month. To do this, right click on the Month list box and choose Advanced Search.
When the Advanced Search dialog comes up, select the Insert_Month in the Search In drop down and enter the following in the Search Expression:
=Insert_Month=Month(today())
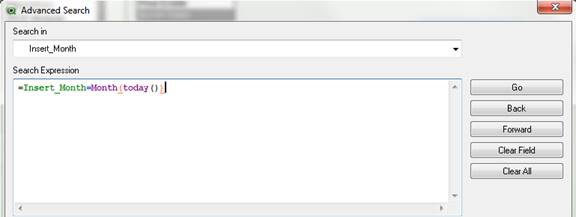
Then press Go and then press Close.
Now you can go to your Current Selections dialog and see that these expressions are now part of your search criteria.
Also, when you save this as a bookmark these expressions will be saved, thus making your bookmark dynamic.
Other Advanced Search Examples
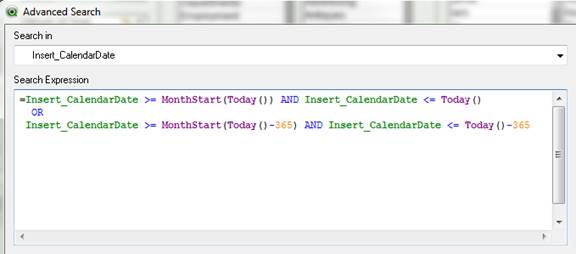
Here is another example. This searches through the Insert_CalendarDate field and selects Month to Date and Previous Month to Date selections.
=Insert_CalendarDate >= MonthStart(Today()) AND Insert_CalendarDate <= Today()
  OR
 Insert_CalendarDate >= MonthStart(Today()-365) AND Insert_CalendarDate <= Today()-365
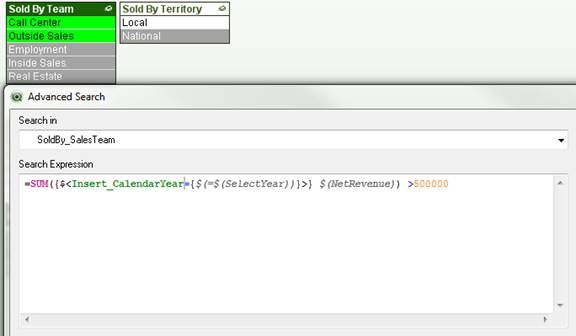
Advanced Search with Aggregation Formula
Below is a cool way to use the Advanced Search. In this example we are selecting Sales Teams that have a Net Revenue in the current year greater than $500,000.
Another twist on the above formula would be to add in a date range within the year, for example, Month to date. To do this, you would use the formula below.
=SUM({$<Insert_CalendarYear={$(=$(SelectYear))},Insert_CalendarDate={">=$(=MonthStart(Today()))<=$(=Today())"}>} $(NetRevenue)) >40000
Applying a Bookmark on Export
Now that you know how to create a dynamic search, you can save that dynamic selection criterion as a bookmark.
If you have set up your export to run every day automatically, we can use a macro to apply the bookmark before the export occurs. You will do this if you want additional filters to further refine your export results.
Your bookmarks may include hardcoded criteria such as Product Name, Ad Type, etc. And/Or the dynamic filters such as dates like current week of year, etc that we created using the Advanced Search functionality.
Now that we have a bookmark create we can recall that bookmark and then run our export. This functionality is encapsulated in the AML_RecallBookmark macro.
To enable this functionality, create a bookmark and add the following line to your ExportDriver function:
call AML_ApplyBookmark ("BookmarkName")
The full function then will look as follows:
sub ExportDriver
  if AML_GetVariableContents("vRunExport") = 1  then
    call AML_ApplyBookmark("BookmarkName")
    call AML_PrintToExcel("vExportLocation", "ExportChart", "SoldBy_SalesTeam")
    ActiveDocument.GetApplication.Quit
  end if
end sub